As we know, Clapton coils always give us decent flavors. A lot of vapers are paying a lot for pre-built Clapton coils, pre-built Clapton coils are still less expensive than stock coils/subohm coils though. Have you ever thought of making your own Clapton coil? In this blog we’re going to show you how to make Clapton coils. We’ll use 24ga and 34ga Kanthal A1 wire.
Tools/things you need for making Clapton coils
- Toothless pliers
- Swivels
- A drill
- Coil jig
- Wire
Steps on making Clapton coils
- Take 10-inch 24ga wire
- Straighten the core wire
- Bend the tip of the 24ga wire at a 45 degree and make it an L shape
- Insert one end of the wire into the chuck
- Grab the other end with pliers and hold it tight and twist it until it’s straight
- Take your core wire out of the drill and attach it to your swivels
- Reattach your core to the chuck
- Insert the 34ga wire into the chuck
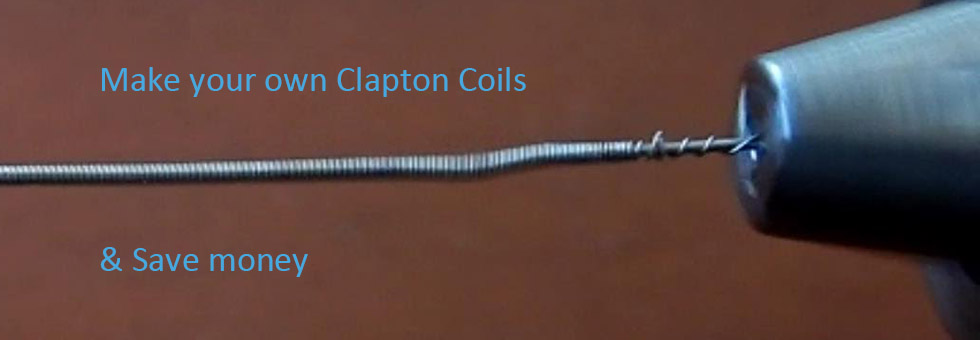
- Anchor the drill it’ll start making Clapton wire
- Take out the Clapton wire and wrap them with a coil jig and cut the leads, you’ll have your own Clapton coils
In step 5, if you have a kink in your wire that you can’t get out by just twisting it straight, you can take your pair of pliers and put them before the kink and then start the drill. The drill will pull it with pressure outwards and it will straighten the kink right out.
Making your own Clapton coils not only save you a lot of money, but also bring more fun to vaping, of course you need to have enough time to do that as making Clapton coils is a bit time consuming. If you don’t have enough time, you can check out pre-built Clapton coils in our site.