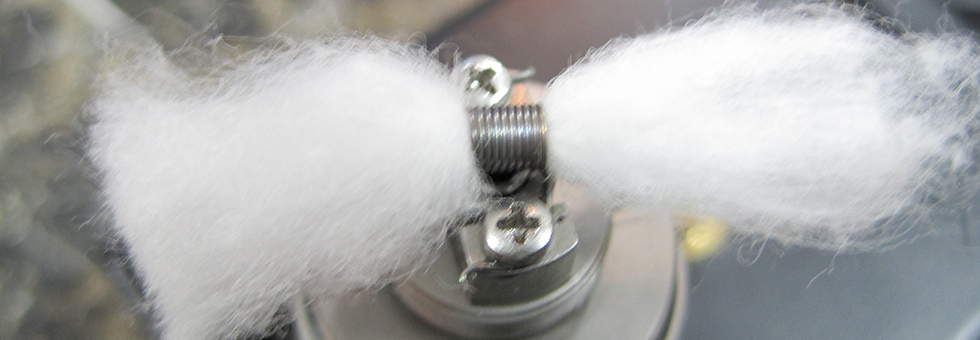
Today we are going to learn about wicking. You must have seen a lot of coil builds but what do you do after the coil has been built? You have to wick it up. There are really simple ways to do it and then there are other kind of cool and unique ways to do it. In this article we’ll show you three different ways to wick your dual coil, which includes a traditional dual coil, two strips of cotton, a roller-coaster build and a square wicking tutorial.
For a traditional dual coil build, we put one side in and wrap it around to the other side and then this side to make it really tight. Twist it and put it through, you can also pull it out on the side so that this wick is just going to sit in this juice well and connect with the edge. Once you have done that, you just need to cut off the excess. Make sure those two are touching so that helps get the juice in from that side so that your cotton doesn’t get choked up. On this end against the edge of the juice well with cotton you’re going to take a long piece, get it nice and skinny at the end and stick it through the hole and pull it through. Make sure there is some resistance but not a ton. You need to stick one end in and then on the edge you should cut it with enough for it to tuck under your coil. Then you can use the same strip if it’s long enough to go into the other coil tuck. This would be your quick and easy way to wick up a dual coil.
Next build we’re going to wick is also on the dual coil called the roller coaster. This roller coaster coil build is a little bit more advanced and you need a longer strip of cotton. We wick both coils with the same piece of cotton. First get your piece of cotton just like you would in a regular quick and easy dual coil build pull it through. This roller coaster coil build is really only good for RDAs that have a higher cap. With low cap RDA it doesn’t really work very well because the airflow sits right on the cotton and it prevents the vapor from coming out. So when you put it through the first time and you want to still have some cotton down, you bring the cotton legs over the top. Then you’ll need to wrap it back through using your tweezers to help you out. Make sure that there’s enough kind of sitting down on the side and you’re not covering the coil on the top and then it’s going over right. On one side you need to make sure that you have enough sitting there so the juice collects smoothly and then you’re going to cut off the excess on the other side. You can leave the cotton a little bit longer so that we get some cotton underneath crane. And then go up and over and on the other side to make sure that it’s pulling down on both sides. Once you get juice on this it’ll be much easier to work with. It uses gravity to pull the juice down on to the coil.
The next wicking method is putting the cotton underneath the coil from either side, which is really good for low ohm builds because it wicks up the juice really fast and really easily. You’re going to start out like we normally do, pull it all through one side and then you’re going to take the longer side over that you pulled through, and you’re going to go through the two posts on the other side and under the coil on the other side. After pulling it straight through the other side, you can make sure that you still have some fluff on this side for the juice to wick up. Once you got a good pull through on the bottom you can go ahead and cut it off and then you can use the same string of cotton or you can use something else to do this other side. It’s kind of a cool way of doing it where all your cotton is going to be kind of integrated with each other so it forms kind of a square. Then you need to cut all your tails off. To stop the tails from sticking out you’ll need to pull it in just a little bit and actually you can cut it a little bit more and pull it tight, you just want to make it nice and fluffy on each side. The do the same thing with the other side, cut off the extra and then pull it back on this side, so it’s just barely sitting there, and then tuck all the ends in and make sure you’re good to go with no random first sticking out. That’s the square wicking method. With this square wicking method, you got the little ends sticking out on either side so it provides kind of a nice cushion for your coil cushion of juice.
Above are four techniques that we can use on an ongoing basis. They all kind of serve different purposes. Some of them are quick and easy, and the others are able to help you taste the flavor better.